No edit summary |
mNo edit summary |
||
| (3 intermediate revisions by the same user not shown) | |||
| Line 1: | Line 1: | ||
{{at|xx}} |
{{at|xx}} |
||
| − | '''Altair III''' was |
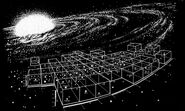
+ | '''Altair III''' was the [[third planets|third]] [[planet]] in the [[Altair system|Altair]] [[star system|system]]. This system was located in [[Sector 9]]. ({{TOS|Amok Time}}; {{TNG|Encounter at Farpoint}}) The location of the Altair system in the [[Milky Way Galaxy]] was depicted in the "The Explored Galaxy" [[star chart]]. ({{TNG|Conspiracy}}, ''production art'') |
In the early [[2360s]], when the {{USS|Hood|Excelsior class}} visited this system, [[Lieutenant Commander]] [[William T. Riker]] refused to let [[Captain]] [[Robert DeSoto]] [[transporter|transport]] to the surface of Altair III with an [[away team]] because he deemed the action as too dangerous. By preventing his captain from beaming down, Riker disobeyed a direct order and risked a general [[court martial]]. ({{TNG|Encounter at Farpoint|The Pegasus}}) |
In the early [[2360s]], when the {{USS|Hood|Excelsior class}} visited this system, [[Lieutenant Commander]] [[William T. Riker]] refused to let [[Captain]] [[Robert DeSoto]] [[transporter|transport]] to the surface of Altair III with an [[away team]] because he deemed the action as too dangerous. By preventing his captain from beaming down, Riker disobeyed a direct order and risked a general [[court martial]]. ({{TNG|Encounter at Farpoint|The Pegasus}}) |
||
| − | In [[2367]], the planet appeared on a chart in [[Captain]] [[Benjamin Maxwell]]'s [[ready room]] on the {{USS|Phoenix}}. ({{TNG|The Wounded}} ''[[:de:Bild:Taktisches_Statusdisplay.svg| |
+ | In [[2367]], the planet appeared on a chart in [[Captain]] [[Benjamin Maxwell]]'s [[ready room]] on the {{USS|Phoenix}}. ({{TNG|The Wounded}} ''[[:de:Bild:Taktisches_Statusdisplay.svg|production art]]'') |
| − | ''In an [[alternate timeline|alternate]] [[2366]], Altair III was marked on a [[tactical situation monitor]] showing the fleet deployments in the [[Federation-Klingon War (alternate timeline)|Federation-Klingon War]].'' ({{TNG|Yesterday's Enterprise}} '' |
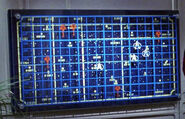
+ | ''In an [[alternate timeline|alternate]] [[2366]], Altair III was marked on a [[tactical situation monitor]] showing the fleet deployments in the [[Federation-Klingon War (alternate timeline)|Federation-Klingon War]].'' ({{TNG|Yesterday's Enterprise}} ''production art'') |
<gallery> |
<gallery> |
||
| Line 16: | Line 16: | ||
In [[Gene Roddenberry]] and [[D.C. Fontana]]'s final draft script, the planet was originally named [[Altair IV]]. [http://www.st-minutiae.com/academy/literature329/102.txt] |
In [[Gene Roddenberry]] and [[D.C. Fontana]]'s final draft script, the planet was originally named [[Altair IV]]. [http://www.st-minutiae.com/academy/literature329/102.txt] |
||
| + | On the "The Explored Galaxy" chart, the Altair system was located between the [[Tholian Assembly]] and [[Romulus]]. According to dialog in {{e|Call to Arms}}, the two were [[Alpha Quadrant]] powers. |
||
| − | The location of Altair III was depicted twice on the tactical situation monitor. |
||
| − | |||
| − | "The Explored Galaxy" was a map of charted space in the [[Milky Way Galaxy]]. The Altair system, represented by Altair VI, was located between the [[Tholian Assembly]] and [[Romulus]]. Both locations were identified in {{DS9|The Search, Part II|Call to Arms}} as being located in the Alpha Quadrant.This chart was also seen in several ''[[Star Trek: The Next Generation]]'' and ''[[Star Trek: Deep Space Nine]]'' episodes set in the [[24th century]], from the year [[2364]] to [[2370]]. These were {{TNG|Conspiracy|The Measure Of A Man|The Emissary|The Mind's Eye|The Game}}, and {{DS9|In the Hands of the Prophets|Cardassians}}. |
||
According to the ''[[Star Trek: Star Charts]]'' (pg. 44), the Altair system, and Altair III, was located in or near Federation space, in the [[Alpha Quadrant]]. |
According to the ''[[Star Trek: Star Charts]]'' (pg. 44), the Altair system, and Altair III, was located in or near Federation space, in the [[Alpha Quadrant]]. |
||
Revision as of 23:52, 2 September 2013
AT: "xx" Altair III was the third planet in the Altair system. This system was located in Sector 9. (TOS: "Amok Time"; TNG: "Encounter at Farpoint") The location of the Altair system in the Milky Way Galaxy was depicted in the "The Explored Galaxy" star chart. (TNG: "Conspiracy", production art)
In the early 2360s, when the USS Hood visited this system, Lieutenant Commander William T. Riker refused to let Captain Robert DeSoto transport to the surface of Altair III with an away team because he deemed the action as too dangerous. By preventing his captain from beaming down, Riker disobeyed a direct order and risked a general court martial. (TNG: "Encounter at Farpoint", "The Pegasus")
In 2367, the planet appeared on a chart in Captain Benjamin Maxwell's ready room on the USS Phoenix. (TNG: "The Wounded" production art)
In an alternate 2366, Altair III was marked on a tactical situation monitor showing the fleet deployments in the Federation-Klingon War. (TNG: "Yesterday's Enterprise" production art)
Background
In Gene Roddenberry and D.C. Fontana's final draft script, the planet was originally named Altair IV. [1]
On the "The Explored Galaxy" chart, the Altair system was located between the Tholian Assembly and Romulus. According to dialog in "Call to Arms", the two were Alpha Quadrant powers.
According to the Star Trek: Star Charts (pg. 44), the Altair system, and Altair III, was located in or near Federation space, in the Alpha Quadrant.
External link
- Template:NCwiki


